HOME DVD PLAYER V10M10_IM_EN_12312007
www.jWIN.com
20
CARE AND MAINTENANCE GUIDES
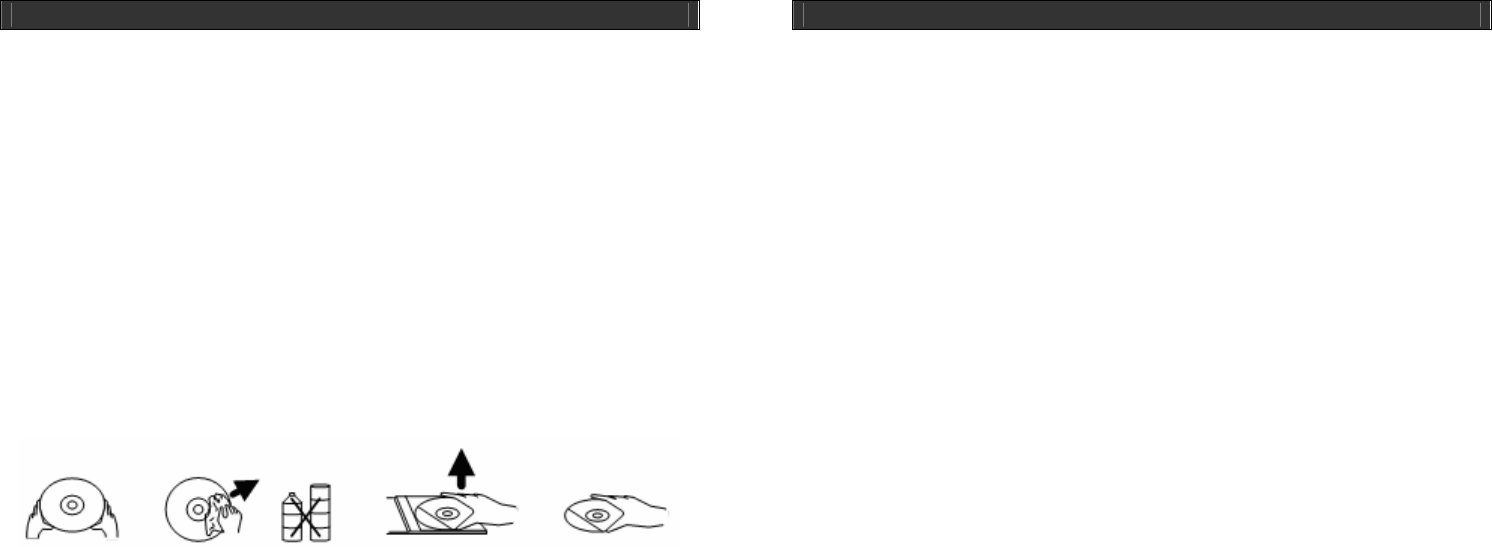
Handling a Disc
• Treat the disc carefully. Handle the disc only by its edges. Never allow your fingers to
contact with the shiny, unprinted side of the disc.
• Do not attach adhesive tape, stickers etc., to the disc label.
• Clean the disc periodically with soft, lint-free, dry cloth. Never use detergents or adhesive
cleaners to clean the disc. If necessary, use a CD or DVD cleaning kit.
• If disc skips or gets stuck on a section of the disc, it is probably dirty or damaged
(scratched).
• When cleaning the disc, wipe in straight lines from the centre of the disc to the edge of the
disc. Never wipe in circular motions.
• To remove a disc from its storage case, press down on the centre of the case and lift the
disc outs, holding it carefully by the edges.
• Fingerprints and dust should be carefully wiped off the disc's recorded surface with a soft
cloth. Unlike conventional records. compact disc have no groove to collect dust and
microscopic debris, so gently wiping with a soft cloth should remove most particles.
Cleaning the Unit
• To prevent fire or shock hazard, disconnect your unit from the AC power source when
cleaning.
• The finish on the unit may be cleaned with a dust cloth and cared for as other furniture,
Use caution when cleaning and wiping the plastic parts.
• If the cabinets become dusty wipe them with a soft dry dust cloth. Do not use any wax or
polish sprays on the cabinets.
• If the front panel becomes dirty or smudged with fingerprints it may be cleaned with a soft
cloth slightly dampened with a mild soap and water solution. Never use abrasive cloths or
polishes as these will damage the finish of your unit.
Caution: never allow any water or other liquids to get inside the unit while cleaning.
HOME DVD PLAYER V10M10_IM_EN_12312007
www.jWIN.com
21
TROUBLESHOOTING GUIDE
No picture or no sound
• Ensure whether the [POWER] button on the front panel is on.
• Ensure whether the power cord is connected properly.
• Ensure the power outlet is working.
Picture but no sound
• Ensure the audio jacks are securely connected.
• Ensure the volume is turned up to the proper level.
• Ensure you have set the AUDIO settings correctly.
• Ensure you have connected the audio cable properly.
• Ensure the audio is not set to mute.
Sound but no picture
• Ensure the video jacks are securely connected.
• Ensure you have connected the video cable properly.
• Ensure you have set the VIDEO settings correctly.
Poor picture or poor sound
• Ensure you have set the AUDIO and VIDEO settings correctly.
• Ensure the disc is not scratched or stained.
The “Bad Disc” indication is displayed.
• Ensure the disc is not warped, damaged or deformed.
• Ensure the disc is not badly stained or damaged.
• Ensure the disc format is compatible with the player.
The remote control isn’t working.
• Make sure the [POWER] button on the main unit is set on.
• Point the remote control directly at the remote control sensor on the main unit.
• Remove any obstacles between the remote control and the remote control sensor.
• Change the remote control batteries.
The “No Disc” indication is displayed.
• Ensure you have loaded a disc.
• Ensure the disc is not upside down.
• Ensure the disc isn’t distorted, stained or scratched.
The main unit is not working.
• Power off the main unit and turn it on again.
 (20 pages)
 Manymanuals.com
 Manymanuals.de
 Manymanuals.fr
 Manymanuals.it
 Manymanuals.pl
 Manymanuals.cz
 Manymanuals.es
 Manymanuals-pt.com
Comments to this Manuals